
First of all, you need to clean and prepare the surface for welding. De-greaser and a sandblasting shot is a good mix.
The easiest part is this plate, it will hold the vibration and dissipate the stress. Spot welding at 1cm spacing is good enough ( if your penetration is good ). Because you don’t want to reduce the strength of your sub-frame itself by weld it too much. Welding too much can reduce the capacity of the steel, please refer to a professional welder if you are not 100% sure of what you doing.

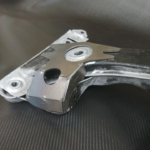
Now prepare the box by bending every parts ( don’t forget to bend a left and a right ! ). You can normally bend it by hands with a simple wisegrip.

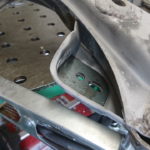
Install the box over the control arm mounting point, they will be centered. And turn the box to align the engine mount plates. ( It will not touch it for the moment, don’t panic ).
Now you can make some tacks to hold the box. You can tack the 2 finger that pointing to the center of the sub-frame and on the round pointing at the rear of the sub-frame. ( Don’t weld to much at this moment, we don’t finished the adjustment yet ).


With a C-clamp, you can make the 2 outer fingers contact with the sub-frame and then tack it.

Now, its time to bend the box to fit the engine mount. Put a C-clamp in 45deg to make the first contact. And then tack the height ( Don’t tack the frontest part of the reinforcement yet ).
After that is done, put the C-clamp on the end of the reinforcement box to close the box and get a good contact area for welding.


You can now fill every bending line and cut line. We normally using a TIG welder for that, because its generally don’t need to grind everything after ( over welding material of spatters ).

You can now finish to weld everything in position. We used a MIG welder at this step to save a lot of welding time compared to a TIG. ( Again, do not over-weld, it can reduce the structural strength of the sub-frame itself ).


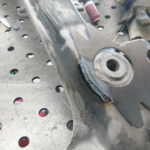
Now it time for the anti-sway bar reinforcement ! You can conform the sub-frame and the plates together and obtain a good welding gap ( less as possible ). Tack it and remove the clamps.
Install the little brace and put it the most contact possible to the sub-frame shape.


You can now weld it all around. ( Remember, welding to much is not always better ).


You can now paint your fully reinforced sub-frame ! In our case, we fully finish the sandblasting process on the sub-frame and the new reinforcements to get it tri-coat powder-coated for a lifetime durability.

